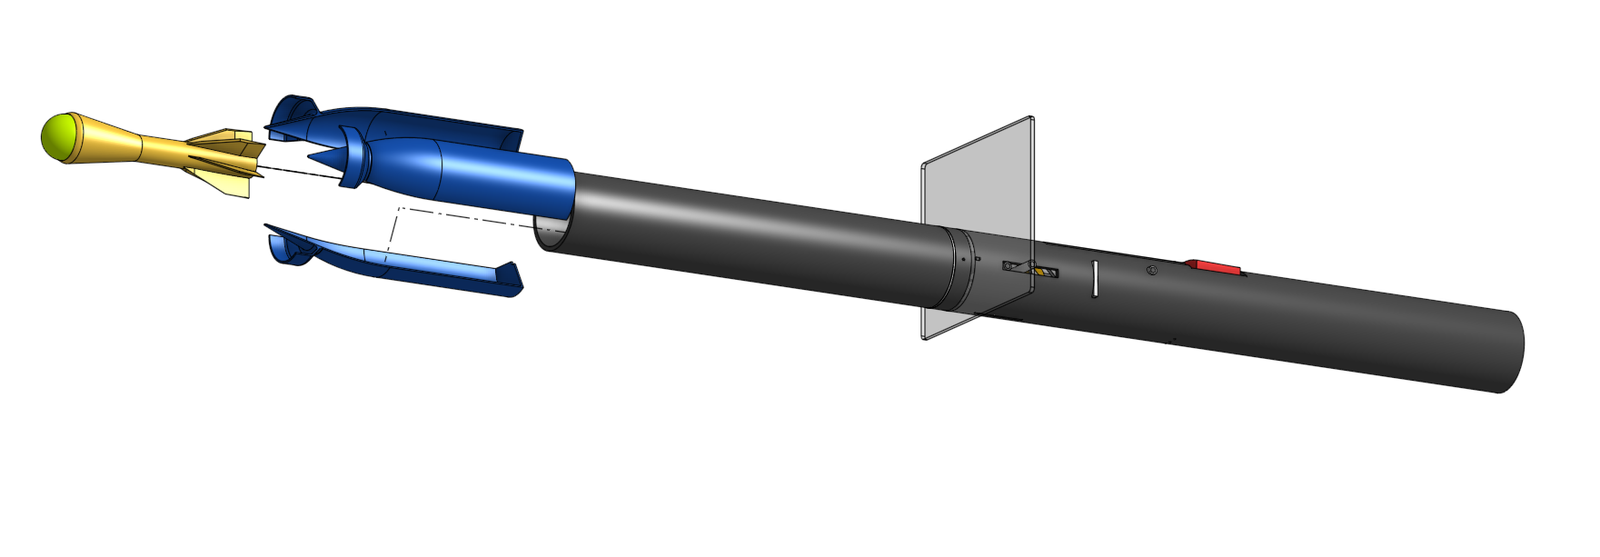
3D Modeling a Nail Launcher
Introduction
Join us on our journey to make a tennis ball launcher. We will talk about how we designed the firing mechanism, ammunition and body of the tennis ball launcher.

Ammunition
The projectile consists of two primary components: the shell casing, which houses and protects the inner mechanisms, and the Tennis Ball Dart, which houses the propelent (one 25g CO2 Cartridge) and the tennis ball.

Dart
The Propulsion system consists of a single 25 Gram CO2 Canister. In order to attach the CO2 Canister to the Tennis Ball, we made a 3D printed adapter (see below). This also includes the 6 fin stabilizers which are directly attached at a 5 degree angle to achieve stabalization through spinning the bullet.

Shell
We designed a sabo shell which allows for a larger surface area in the back to be proppeled forward. Then, once the shell has exited the barrel, the three pieces of the outer shell are discarded via the high drag "parachute" at the front of the shell. This allows us make the shell more powerful and because the crossection size of the dart is smaller, it has less air resistance.
The Launcher

Body
The barrel and main body is made up of a 2' and 3' pvc pipe (~4.5" OD, ~4" ID). Seperating the barrel and the back half of the body is a 4.5" diameter, 1/8" thick aluminum plate. This acts as the back of the barrel and is where the gasses will be trapped against.

Firing Mechanism
As for the firing mechanism, it consists of a ~2.5" long nail. In order to keep a consitent striking point by the "firing pin" it is guided on a rail system via slots cut out on the PVC pipe with aluminum rods. Thicker aluminum rods are used on the side which allow for the user to pull back on and set the firing pin.
We spend lots of time to make these weblogs high quality. If you enjoyed this weblog, make sure to follow along on Youtube and Instagram and share with friends!
